When you’re out in the wilderness, knowing how to build a basic shelter can be the difference between a safe, comfortable night and a dangerous situation. Whether you’re caught in unexpected weather, lost, or simply need a quick refuge, understanding emergency shelter building is an essential survival skill. This guide will walk you through the fundamental techniques for constructing shelters in various environments, ensuring you’re prepared for whatever nature throws your way.
Why Shelter is Critical in Emergency Situations
Shelter is one of the three fundamental needs for survival, alongside water and food. In an emergency, your shelter provides protection from the elements—wind, rain, snow, and sun—and helps to regulate body temperature. Without adequate shelter, you’re vulnerable to hypothermia, heatstroke, and other environmental dangers. Furthermore, a well-constructed shelter can offer psychological comfort, a crucial factor in survival situations.
Assessing Your Environment
Before you start building a shelter, take a moment to assess your environment. The type of shelter you need depends on several factors:
- Weather Conditions: Is it raining, snowing, windy, or hot? Your shelter needs to protect you from the current and expected weather conditions.
- Available Materials: What natural materials are around you? Rocks, branches, leaves, and snow can all be used to create different types of shelters.
- Time and Energy: How much daylight do you have left? Are you exhausted, or do you have enough energy to build a more complex shelter? Your physical condition and the time available will influence the type of shelter you choose to build.
- Terrain: Is the ground level or sloped? Are there natural windbreaks like large rocks or trees? The terrain will affect where and how you build your shelter.
Basic Shelter Types
1. Lean-To Shelter
The lean-to is one of the simplest and most effective emergency shelters you can build. It’s ideal for situations where you need a quick refuge from wind or rain.
Materials Needed:
- A sturdy, long branch or fallen tree
- Several smaller branches or sticks
- Leaves, grass, or pine needles for insulation
How to Build:
- Find or Create a Ridge Pole: Find a sturdy, long branch or a fallen tree that can serve as the main support for your shelter. Prop it up against a tree or rock to create a sloped roof.
- Add Support Sticks: Lean smaller branches or sticks against the ridge pole at a 45-degree angle. Space them close together to create a solid frame.
- Insulate the Shelter: Cover the frame with leaves, grass, pine needles, or other natural materials to insulate the shelter and protect it from wind and rain. The thicker the insulation, the better the protection.
- Create a Ground Layer: Line the ground inside the shelter with more leaves or grass to provide insulation from the cold ground.
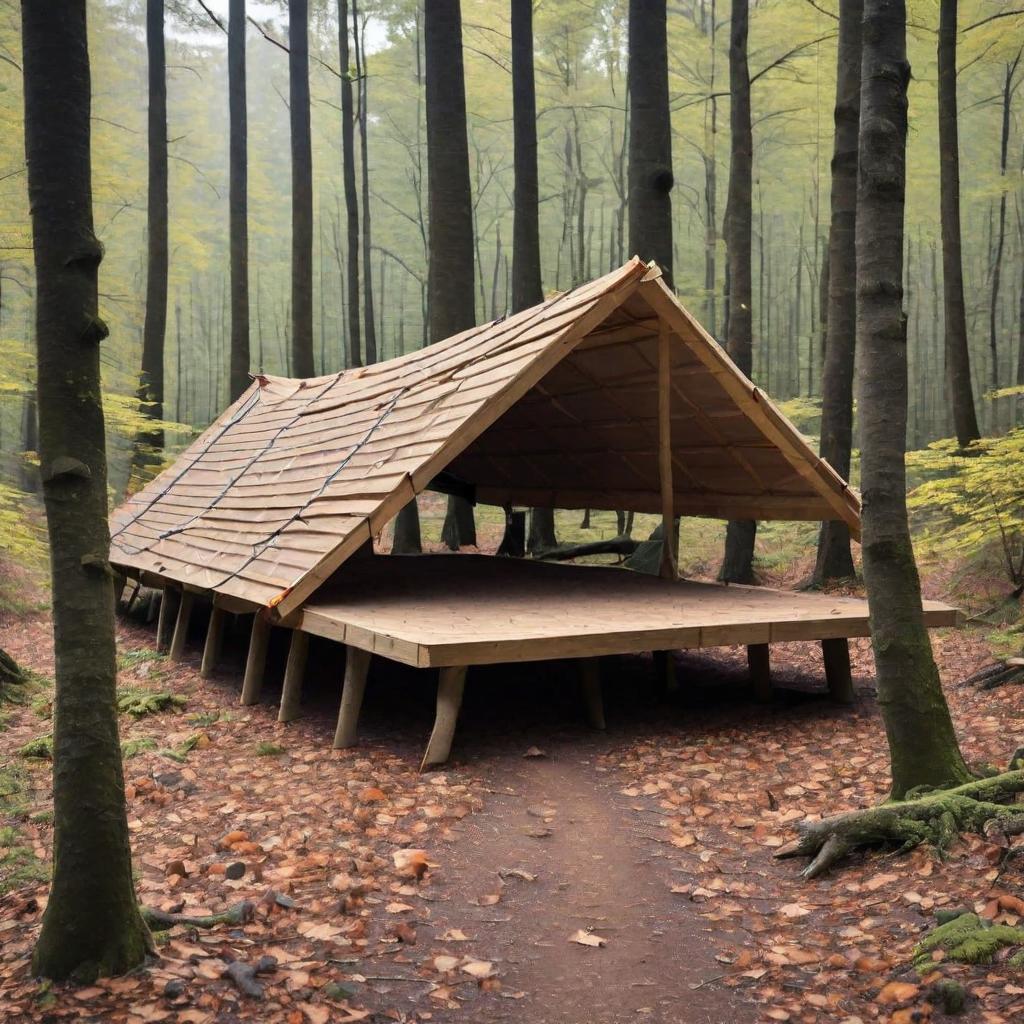
2. A-Frame Shelter
The A-frame is another simple and effective shelter, offering better protection from wind and rain than a lean-to.
Materials Needed:
- Two strong branches or trees close together
- A long branch for the ridge pole
- Smaller branches for the frame
- Leaves, grass, or pine needles for insulation
How to Build:
- Set Up the Ridge Pole: Find two trees or upright branches that are about 6 to 8 feet apart. Lay a long branch horizontally across them to create the ridge pole.
- Construct the Frame: Lean smaller branches against the ridge pole on both sides to create a triangular or “A” shape. The steeper the angle, the better it will shed rain.
- Insulate the Roof: Cover the frame with leaves, grass, or pine needles, making sure to fill in any gaps. The more layers you add, the more waterproof your shelter will be.
- Insulate the Ground: Just like with the lean-to, line the inside of the shelter with natural materials to insulate against the cold ground.
3. Debris Hut
A debris hut is a more advanced shelter that provides excellent insulation and protection from the elements. It’s ideal for cold or wet conditions but takes more time and effort to build.
Materials Needed:
- A long, sturdy branch for the ridge pole
- Two forked sticks or trees to hold up the ridge pole
- Lots of leaves, grass, and other natural debris
- Smaller branches for the frame
How to Build:
- Set Up the Ridge Pole: Place a long, sturdy branch horizontally between two forked sticks or trees to create the ridge pole.
- Build the Frame: Lean smaller branches against the ridge pole to create a steep, triangular frame. Make sure the frame is sturdy and can support the weight of the debris.
- Add Insulation: Pile leaves, grass, and other natural debris on top of the frame until it’s about 2 to 3 feet thick. The thicker the insulation, the warmer the shelter.
- Create an Entrance: Leave a small opening on one side of the shelter for an entrance. You can cover this with more debris or a makeshift door to keep out the cold.
- Insulate the Inside: Line the inside of the shelter with more leaves or grass to provide additional insulation. Crawl inside and pull more debris in after you to seal the entrance.
4. Snow Cave
In snowy conditions, a snow cave can provide excellent protection from the wind and cold, acting as an insulated refuge.
Materials Needed:
- A deep snowdrift or snowbank
- A shovel or your hands for digging
- Sticks or branches for ventilation
How to Build:
- Find a Snowdrift: Look for a snowdrift or snowbank that’s at least 6 feet deep. The deeper the snow, the more insulated your shelter will be.
- Dig an Entrance: Start by digging a small entrance at the base of the snowdrift. Make it just large enough for you to crawl through.
- Hollow Out the Interior: Once inside, begin hollowing out the interior of the snow cave, creating a dome shape. Be sure to leave at least 1 to 2 feet of snow on the walls and roof for insulation.
- Create Ventilation: Poke a small hole in the roof of the snow cave with a stick to allow for ventilation. This will prevent carbon dioxide buildup from your breath.
- Insulate the Floor: Line the floor of the snow cave with branches, leaves, or other insulating materials to keep you off the cold ground.
Additional Tips for Shelter Building
- Prioritize Safety: Always prioritize safety when building a shelter. Make sure the structure is stable and won’t collapse on you.
- Work Efficiently: In an emergency, time is of the essence. Work quickly but efficiently, focusing on the most important aspects of the shelter first.
- Stay Dry: Staying dry is crucial for maintaining body heat. Focus on building a shelter that will keep you as dry as possible, even if it’s not perfect.
- Use Your Gear: If you have a tarp, poncho, or space blanket, use it to enhance your shelter. These materials can provide excellent protection from the elements when combined with natural materials.
- Be Prepared: The best way to be prepared for an emergency is to practice building shelters before you need them. Familiarize yourself with different techniques and practice them in various environments.